Integrating with OpenAI AgentKit
AgentKit workflows can connect to the SyncHub MCP server to query your data warehouse. This can be achieved in two different ways:
- adding in an MCP node; or
- adding an Agent node and configuring its _Tools_
Configuring the connection is the same in both cases.
> **NB:** Before adding this into your workflow you will first need to create a [third party integration](/kb/thirdpartyintegration?api=getresponse) in SyncHub and save the token you created.
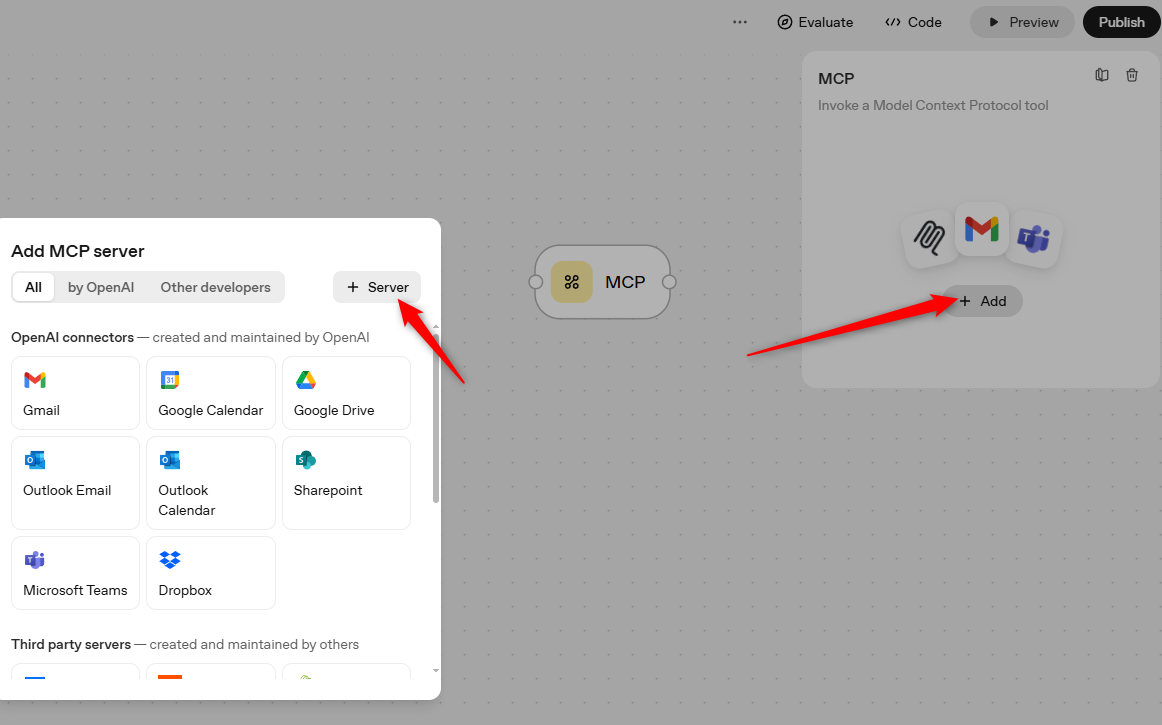
### Create an MCP node
In order to set up an MCP node select MCP from the list and click on the newly created node. This will open the configuration window. Click the `+add` button and then the `+server` button in the new window. This will allow you to configure access to a remote MCP server:
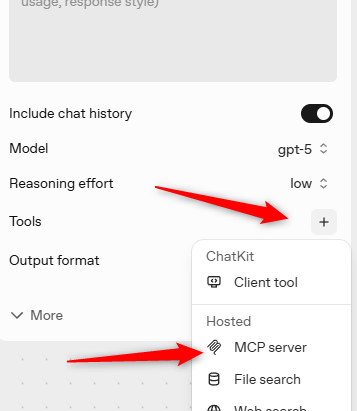
### Create an Agent Node
To set up an Agent node, first add an Agent node from the list then click on it. Select the `+` icon next to Tools and then select _MCP server_ from the options list. This will open the same configuration window as for the MCP node above:
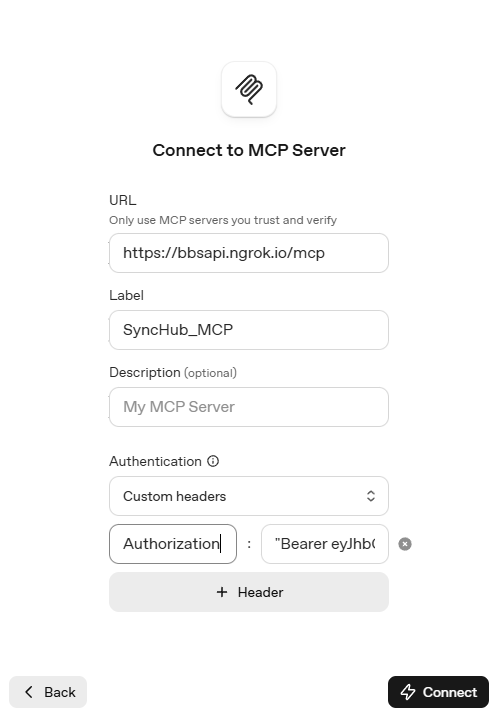
#### Required configuration
In the configuration window paste in `https://api.synchub.io/mcp` for the URL, `SyncHub_MCP` (or similar) for the label and select Custom headers for the authentication method. The header must be "Authorization" and value is "Bearer YOURTOKEN", where YOURTOKEN should be replaced with the one you created earlier. It is **critical** that the value entered has quotation marks around it:
Press the `connect` button and the node will attempt to call the MCP server with the credentials provided. If this is successful you will be able to see the tools available from the server.
Your node is now connected and you can use it however you want in the workflow.