Integrating with n8n
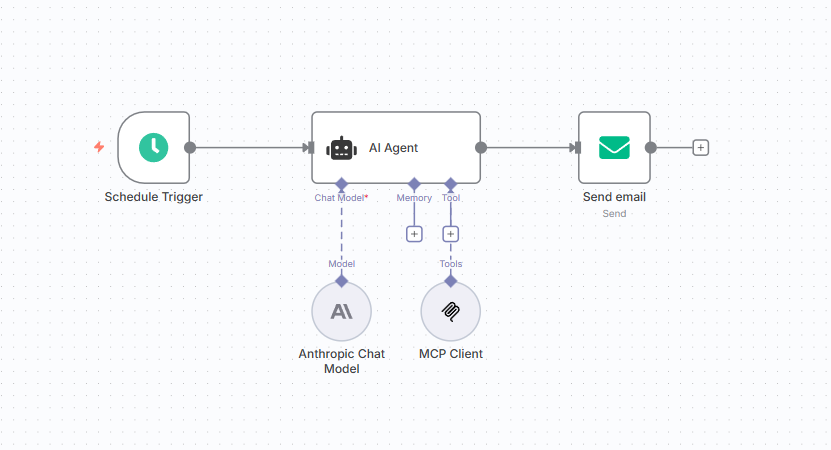
n8n workflows can connect to the SyncHub MCP server to retrieve data from your warehouse. Below is a simple example of a workflow which retrieves a basic data insight on a daily schedule and emails the result to a recipient:
### Create an AI Agent node
The core component is an AI Agent node using an MCP Client node as its Tool source.
> **NB:** Before adding this into your workflow you will first need to create a [third party integration](/kb/thirdpartyintegration?api=square) and save the token you created.
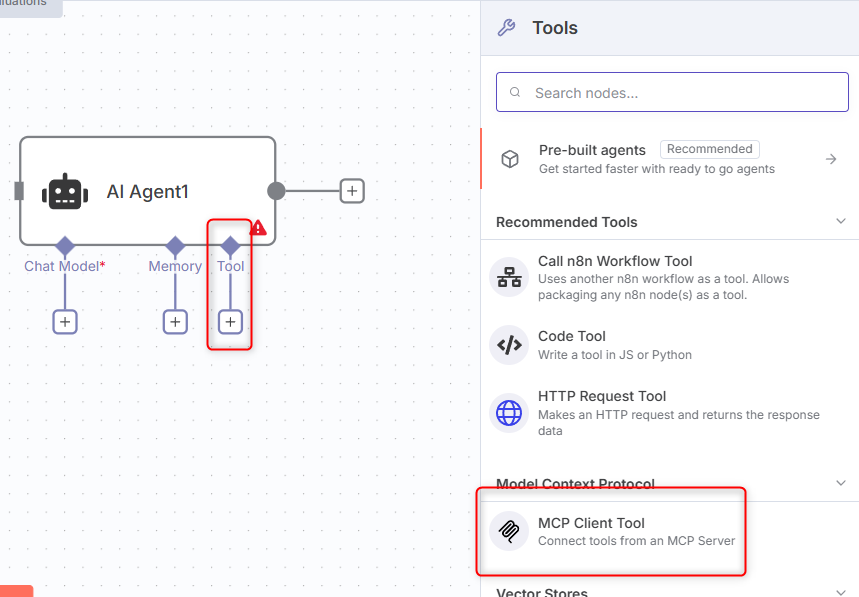
Once you have your token add an AI Agent node to your workflow and click the Tool button. Select MCP Client Tool from the options list:
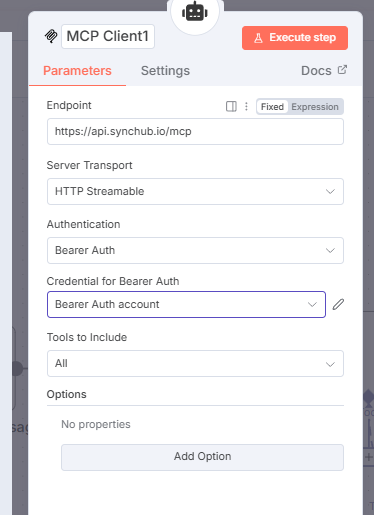
You will then be taken to the configuration window for the Tool node. In the Endpoint box paste in `https://api.synchub.io/mcp`. Server Transport must be `HTTP Streamable` and Authorization must be set to `Bearer Auth`:
### Add your credentials
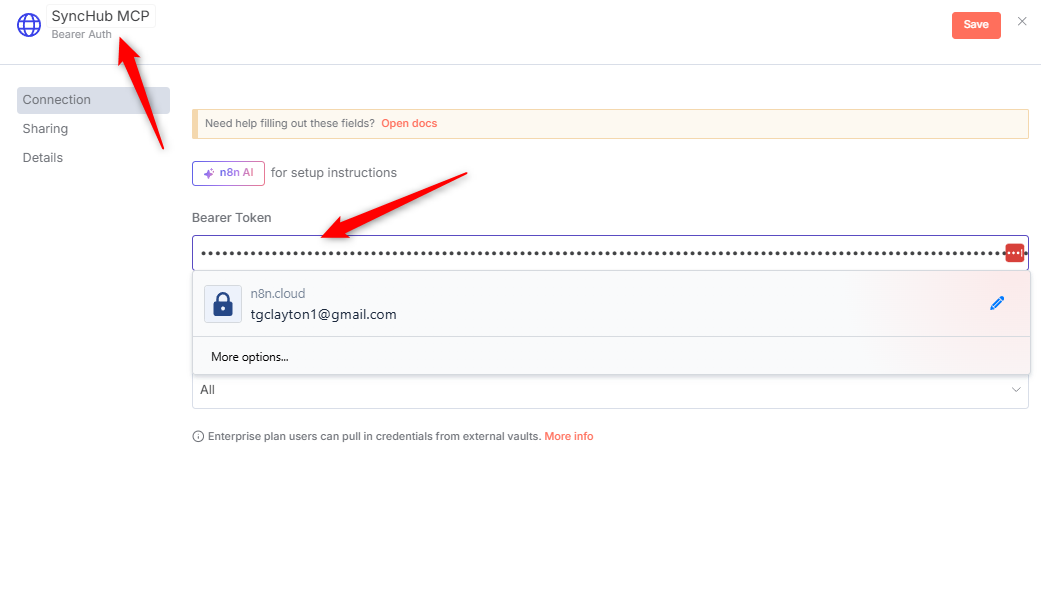
Add a new credential in the Credential for Bearer Auth dropdown. In the new credential configuration window name the credential "SyncHub MCP" then paste your saved third party integration token into the Bearer Token box and save:
Your Agent node is now connected to the SyncHub MCP server and can be incorporated into your workflow however you like.