ServiceM8 is a sophisticated and comprehensive cloud-based platform. For many, the built-in reports and analysis that ServiceM8 offers is enough for our day-to-day needs. However, if you need something a little more customized, you need to aggregate your data over multiple ServiceM8 accounts, or you need to cross-reference your ServiceM8 data with other cloud services, then you’re going to have to build it yourself. And what better way than using the tool you’re already familiar with - Microsoft Excel.
In this article, I’ll take you through the steps to connect Excel to your ServiceM8 data, and get started customizing the reports you need.
Connect to ServiceM8
If you don’t already have a SyncHub account, you can grab a free trial here - go on, I’ll wait - it only takes a minute and you can cancel as soon as you’ve finished this tutorial if you like.
Once connected, you'll find data from all these endpoints streaming down from ServiceM8, such as this example from the Job table:
| GeneratedJobID | TotalInvoiceAmount | JobDescription |
|---|---|---|
| SAMPLE | 393.75 | Fix toilet |
| 1 | 3,718.20 | Install new basin mixer in staff bathroom |
| 2 | 0.00 | Replace water lines & trap |
After connecting, visit your SyncHub Dashboard and grab your new database credentials - you'll need them below.
Reading your ServiceM8 data from Microsoft Excel
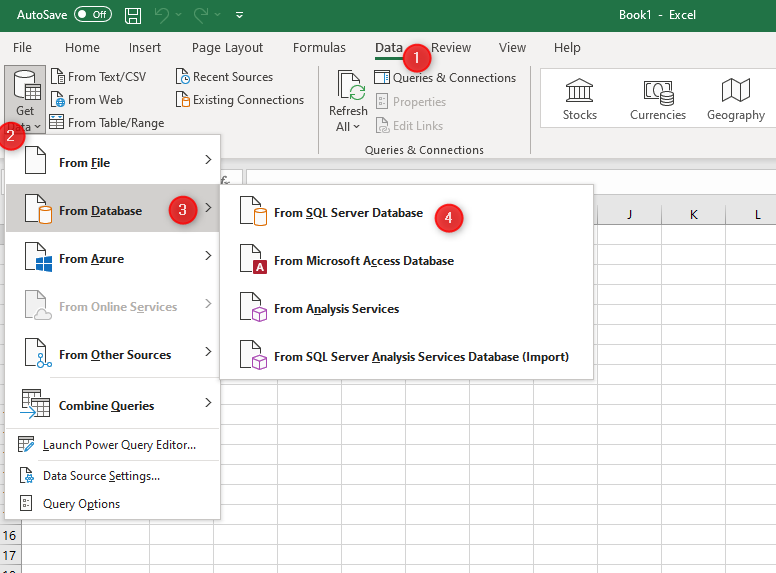
We now just need to tell Excel where to find your data. Select a new SQL Server connection from the Data ribbon:
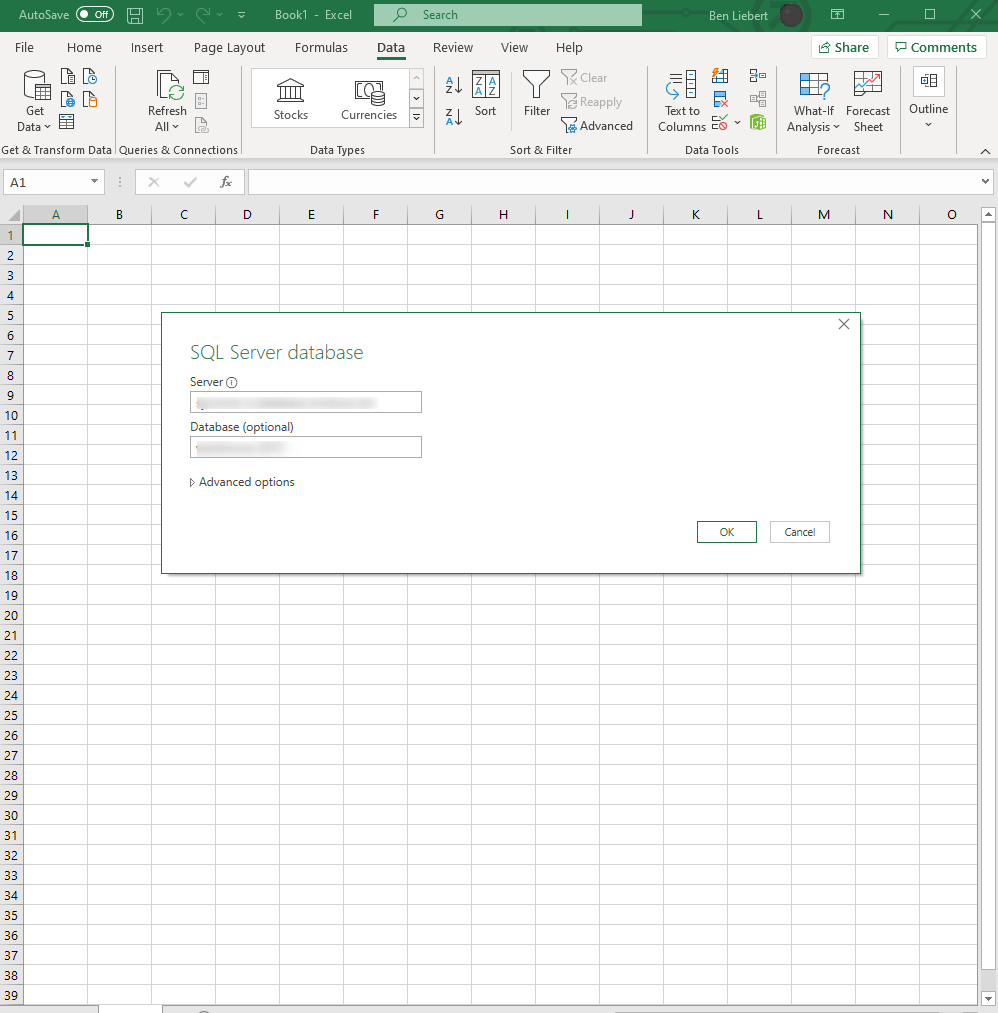
When prompted, enter the Server and Database that SyncHub provided in the first step above:
Next - and this is the part that trips most people up - switch to the Database credentials tab (highlighted by the arrow below), then enter the username and password provided to you by SyncHub in the step above:
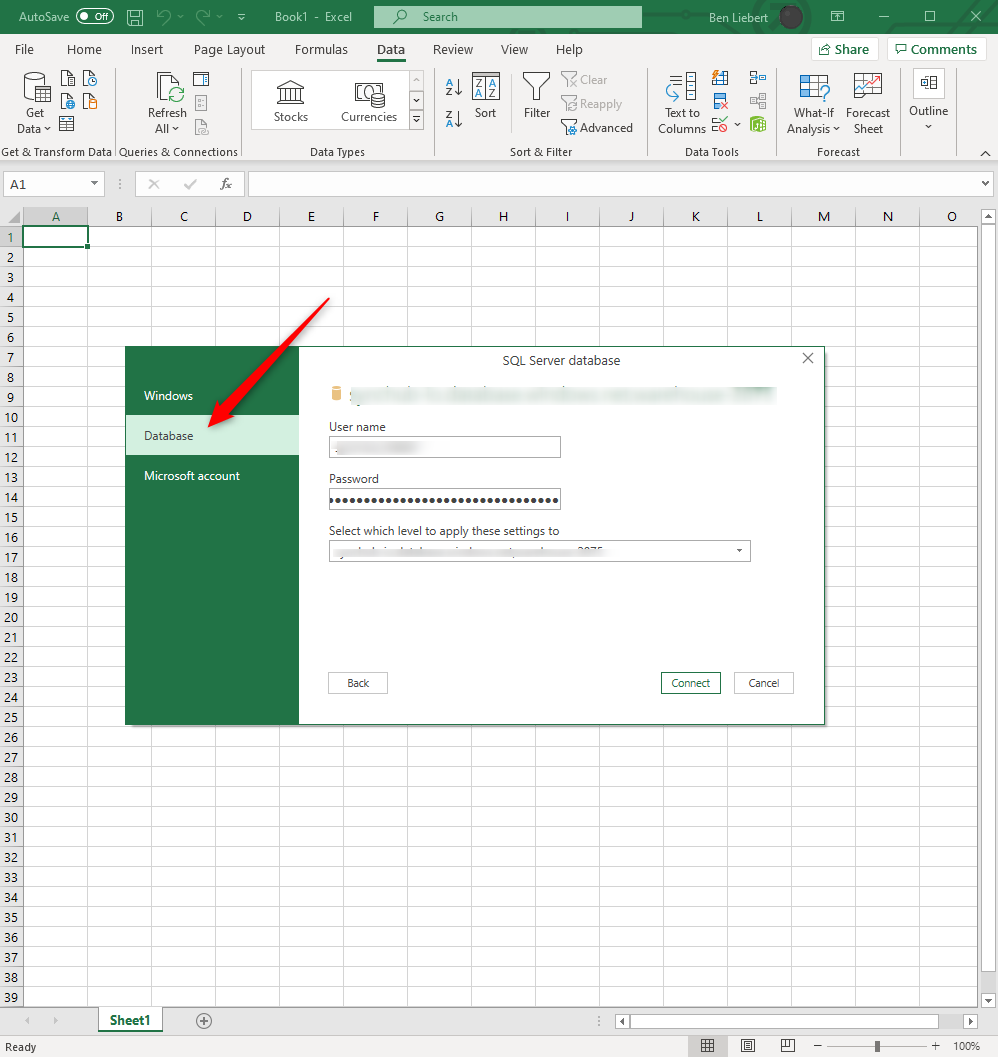
Don’t worry about which level to apply the settings to - database or server - it does not matter to SyncHub.
Troubleshooting
This is the point where you are most likely to run into issues - your login won’t be accepted. After triple-checking that you have used the correct server/database/username/password, the most common resolutions we see are:
- try opening Excel in Administrator mode
- if you are in an office, perhaps you have some firewall restrictions?
All going well, Excel will now present you with the list of tables from ServiceM8, so simply select the data that you’d like to report on. Excel keeps things really simple by adding each “table” from SyncHub as a new tab.
Keeping your data up-to-date
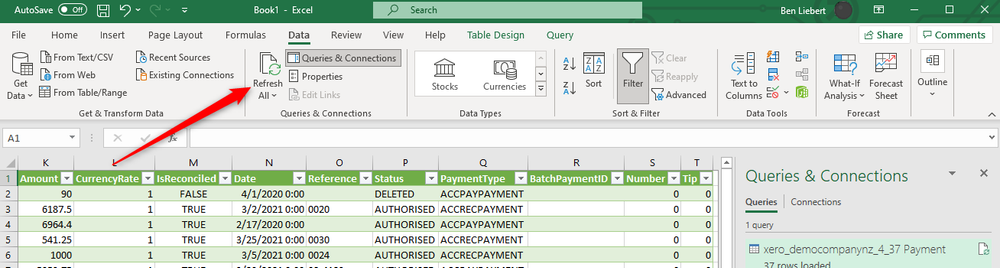
SyncHub updates it’s staged data from ServiceM8 in near-realtime, but unfortunately Excel does not have a similar feature. But not to worry - the solution isn’t too onerous. Every time you want to refresh your data, simply click the (appropriately named) Refresh button in your Ribbon:
Beyond ServiceM8
ServiceM8-specific reports are essential, but the true power of SyncHub comes when you augment your ServiceM8 data with additional information:
- SyncHub allows you to pull in data from multiple ServiceM8 accounts, and compare/report/aggregate from within the same report. See this blog article for details on aggregating your ServiceM8 data.
- Most businesses use multiple cloud platforms. SyncHub provides connectors to a wide range of popular cloud platforms. Imagine the insights you could gather by consolidating this information into a single dashboard (or see this case study for real-world examples).
So what are you waiting for? Grab a free trial of SyncHub here and see what you can do. In ten minutes from now, you could be reporting against your ServiceM8 data and taking your first steps towards a data-driven business.